How to use Cinema Grade in Davinci Resolve to color grade log footage.
If you are a beginner in color grading it's common to be overwhelmed in the beginning with color grading, and this tool will help you to get to the filmlook movies faster. Thats why Cinema Grade is a brilliant tool. Enjoy reading or watching my tutorial.
How to use Cinema Grade in Davinci Resolve to color grade your gray flat LOG footage in just a minutes.
I've had a lot of experience in color grading, but I'm not a professional colorist. That’s why I want to show you how you can simplify and speed up your color grading workflow so you can focus more on the fun part of filmmaking.
Cinema Grade is also available for M1 chips and now for Windows! https://geni.us/CinemaGrade
You should know a few things before using Cinema Grade in Davinci Resolve.
Since OFX architecture in Davinci Resolve has limitations, you only have access to the Grade page. That means the Correct and Match page is unavailable. Also, you can only access one clip on Cinema Grade’s timeline, unlike in Premiere Pro or Final Cut Pro, where you can color grade an entire project within the app.
However, I will show you a workaround, and I hope Davinci Resolve will allow it in the future. Let's get started!
Setting up Davinci Resolve and choosing an Input LUT.
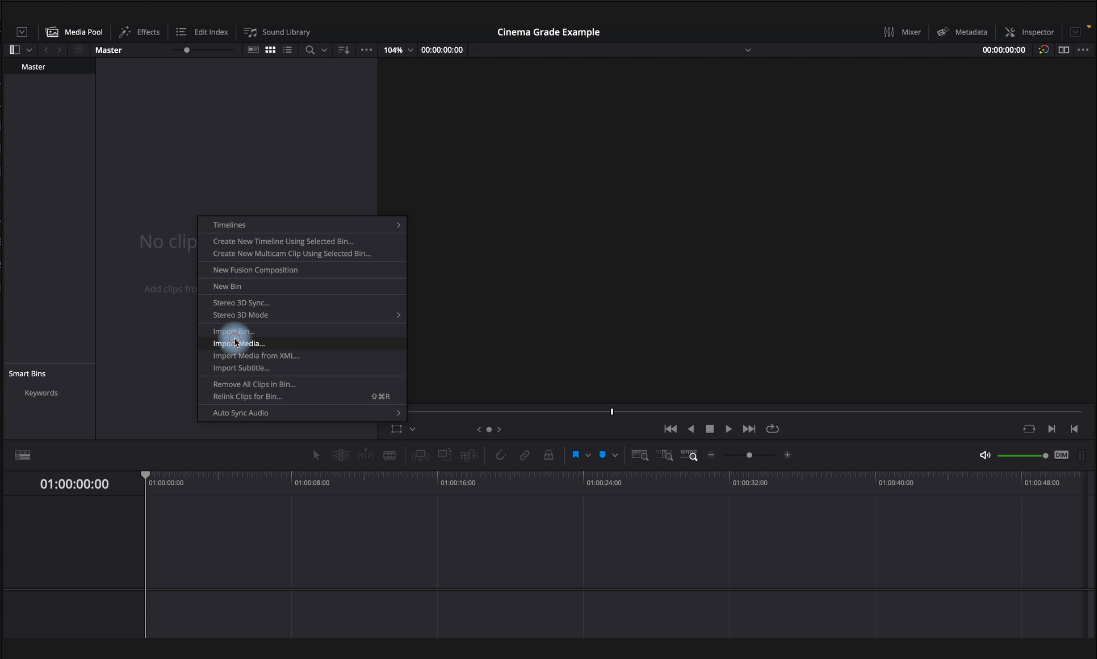
When you have installed Cinema Grade, open Davinci Resolve and go the Media Page, then import your flat log footage, then create a timeline project with it.
If you are new to Davinci Resolve, check out these color grading settings.
Navigate to the Project Settings through Files or the setting symbol at the right. Then go to Color Management and make sure that the color science is DaVinci YRGB and the Timeline color space is Rec.709 Gamma 2.4. Done! DOWNLOAD FREE PDF HERE
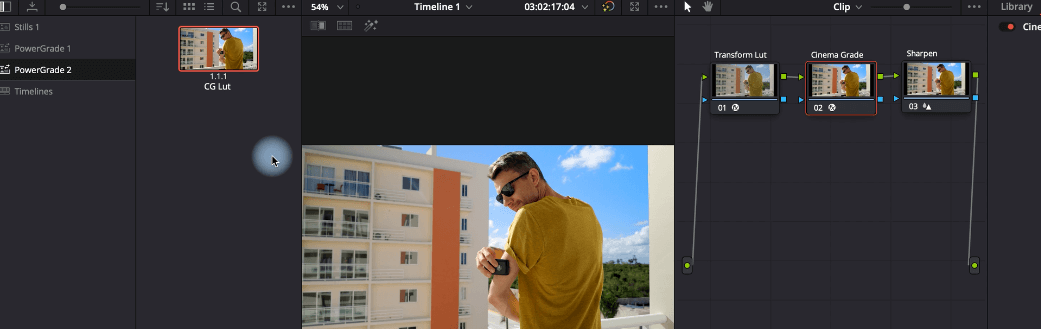
Next, we will return to the timeline and apply the Cinema Grade plugin. Option one is in the Editing page via Effects, but I advise going to the Color Page. In the Nodes panel, create two to three nodes. You will see why later.
Then highlight the second node, go to the second node, open the Effects panel, and drag and drop the Cinema Grade plugin onto your 2nd node.
Click on "Open Controls" and Cinema Grade will open. In order to accurately display the color of the Sony Slog3 footage from my A1, I need to use Color Space Transform.
It depends on which camera you're using which input Lut you have to use. Below I have provided a link to the Sony profile.
What is a LUT:
https://pro.sony/en_MX/technology/professional-video-lut-look-up-table
Shooting with S-Log for color grading:
https://support.d-imaging.sony.co.jp/support/ilc/movie/en/grading/03.html
Go to your first Node we created and click the effects panel on the right. Scroll down to COLOR SPACE TRANSFORM and drag it to the first node. You need to set it up for Sony SLog 3 or whatever picture profile you have used.
Choose Sony S-Gamut3.Cine as the Input Color Space, Sony S-Log3 as the Input Gamma, and leave the Outputs on Use timeline as we did before Rec.709, and then go down to open the Advanced settings and select the "Apply Forward OOTF" option. PUHH, that's a lot, but you're all set.
These are the settings for converting flat log footage accurately, so you don't need to use a Page 1 or an Input Lut in Cinema Grade.
How to use Cinema Grade in Davinci Resolve
I will show you now. How to color correct and grade using Cinema Grade in Davinci Resolve. BTW A Step-by-Step in-depth tutorial on all the features and how to use Cinema Grade is also available on my channel you can view later.
When your first node is created, go to the second node and then to the effects panel to open Cinema Grade by clicking the "Open Control" button. You can also open the Vector Scope panel by pressing Option+CMD & P, which you also will find in the menu bar in view. We are now ready to color correct the footage.
You can see that the Grade page is only available. With the right arrow, open the grade panel to adjust exposure, contrast, white balance, saturation, and vectors.
The interface is directional, meaning going from top to bottom or the top part from left to right.
The best feature is the point and click grading. You can change a spot by clicking it, then sliding up or down. Super easy
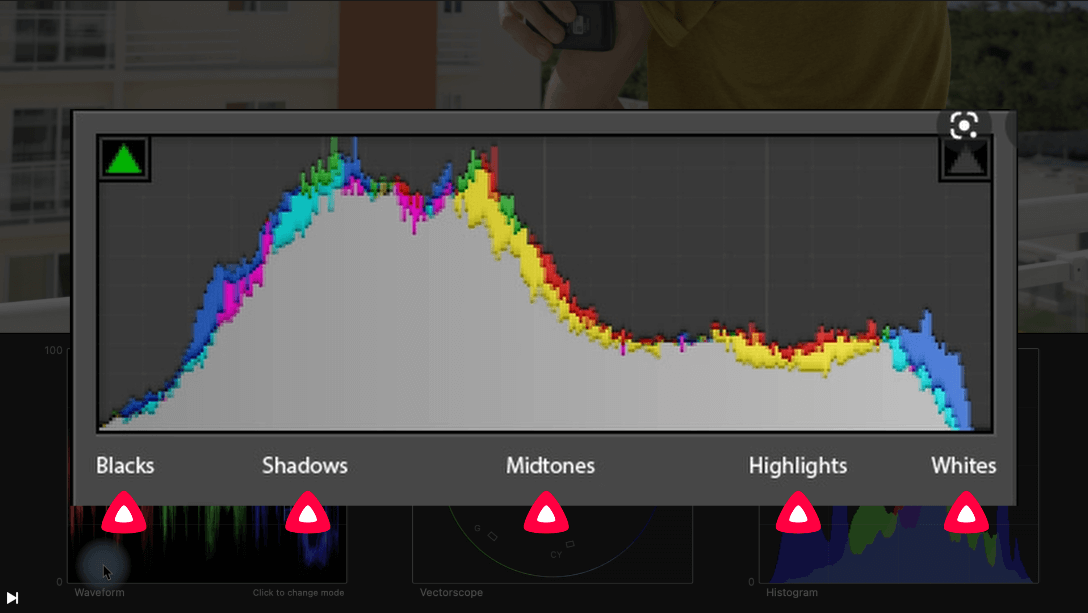
When correcting the exposure it’s important to check the histogram and waveform. It shows you the Luminosity or simple Blacks, Shadows, Midtones, Highlighs and whites
What you don’t want is the graphs going to the left side or dark side the best ist to keep it in the mid range and the start and end parts touching the corners!
After you have exposed your footage, you can use the shortcut V to activate Vector, and then click an area and drag up or down to adjust HUE. You can also hold CMD to adjust Luma or hold Shift to adjust Saturation. After this you can add some filmgrain.

Let’s go to the LUT GALLERY on the left side. When you click the arrow and choose LUTS, you can see all your imported LUTS. To apply the LUT, you just need to double-click it. Open the right panel to go down with the opacity or strength of the LUT. Let's say 30 percent is a good level. Again adjust the exposure if needed.
Now, you can press apply at the right top corner and close Cinema Grade. Go to the effects panel and press APPLY as well. Very Important!
How you can import your Lut’s you also will find this in the other video on youtube.
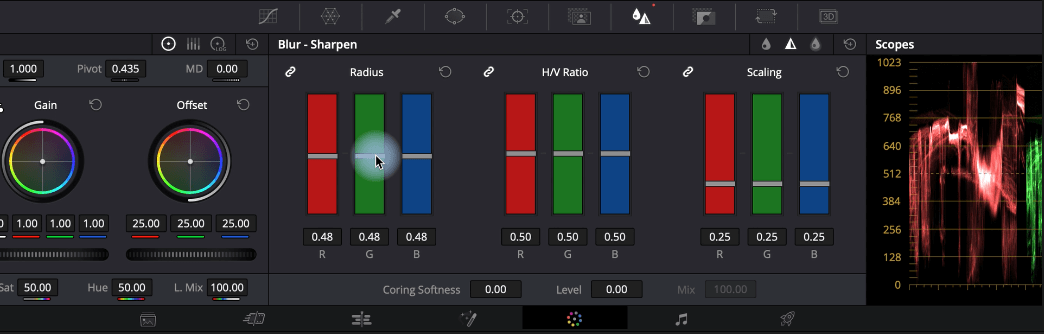
You can sharpen or denoise your footage in Node number 3. In the Blur panel, choose the middle one, Sharpen, and lower the left radius level to 0.48 or lower. Don’t over do it.
For all the other clips, you need to create a PowerGrade before we go to shot matching. Click the Gallery icon on the left top coner, then open Still Albums and highlight PowerGrade. All you have to do now is to go to the screen in the middle of the screen, right click, and select "Grab Still", which will appear on the left side.
You can rename it by right-clicking and selecting "Change Label"
How you are doing Shot Matching?
As we know Davinci Resolve is not allowing it yet but the good thing is we created a PowerGrade which we can easily apply to all the other clips. Then you can go clip by clip to adjust changes by clicking “Open Control ” using Cinema Grade.
First Bonus tipp: Shortcuts
To speed up your color grading workflow even more, learn the SHORTCUTS or download my Shortcut Spreadsheet to print it out.
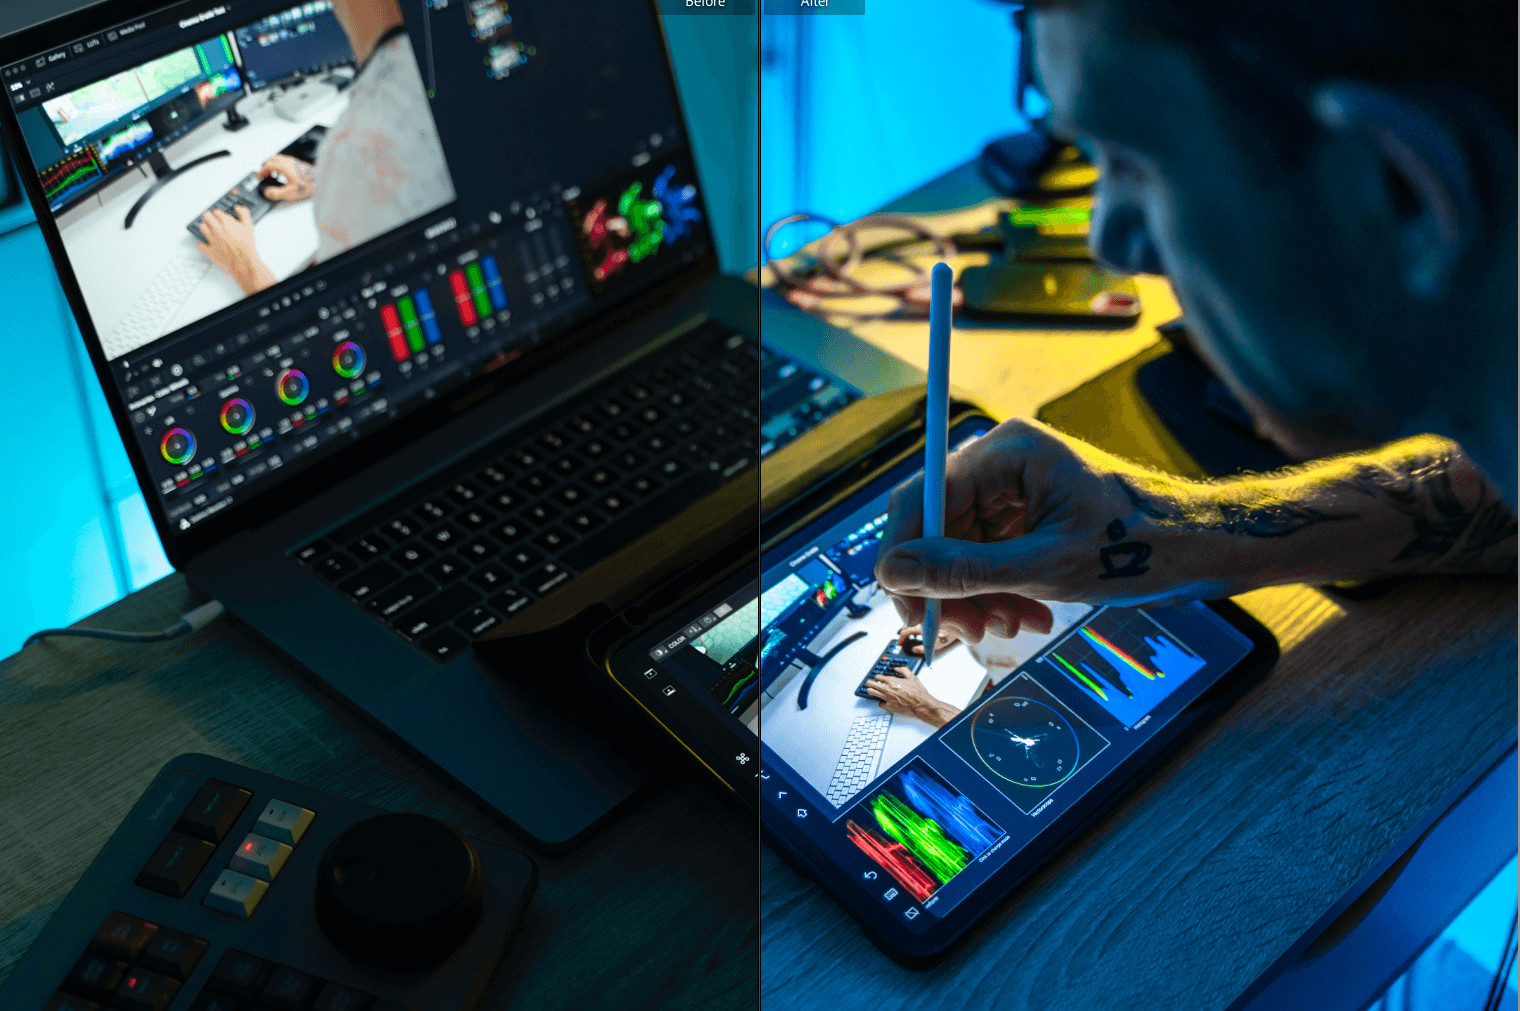
Second bonus tipp: iPad with Pencil
Using the iPad and the Apple Pencil. When you have an iPad and an Apple Pencil, you can color grade with the pencil. I enjoy color grading that way a lot.
So how you gonna do it? Simply connect your iPad with the sidecar and TICK show sidebar, then plug in the Cinema Grade plug.
As you now have the sidebar, you can use CMD, Shift, Option to access the different vector options such as hue, saturation, and luma.

That’s all, thank you so much for reading this blog post, and you can also watch my tutorial. My Step-by-Step tutorial explains everything in detail, including how you can match all your clips.
Feel free to share this blog post with your friends, and if you like my YouTube video, subscribe to my channel to see more. This would mean the world to me as a small creator.
If you have any further questions. Let me know in the comments below. Thanks!
Software:
Davinci Resolve & Speed Editor Panel
Cinema Grade
You don't enjoy reading books like I do? Blinkist can give you a book summary in under 15 minutes, so you can become a better individual. Try it out!
Final Thoughts
Cinema Grade is a brilliant tool even in Davinci Resolve to speed up and simplify you color correction and grading process. It's common to be overwhelmed in the beginning with color grading, and this tool will help you to get to the filmlook movies faster. Enjoy
20% Discount for Cinema Grade for MAC & WINDOWS! ► https://geni.us/FREE-PDF-CinemaGrade
READ OR WATCH: This blog post is also available in video form! Here is the video link to my channel. VIDEO LINK

Timestamps:
0:00 Intro
0:55 Before using Cinema Grade in Davinci Resolve
1:26 Setting up Davinci Resolve Color Managment Setting
2:03 How to apply Cinema Grade
2:32 Apply "Color Space Transform" for LOG footage 3:41 How to color correct and grade
4:32 Checking the Waveform and Histogram
6:35 Create a Power Grade for Shot Matching
7:22 BONUS Part
Check out my Video on Youtube - 👍🏻Like, Share and Subscribe 🙏❤️😀

Get your ONE-CLICK Teal & Orange + Urban Style preset for Lightroom desktop & mobile.

Get your 20% discount for Cinema Grade the time-saving color grading tool for Davinci Resolve, Adobe Premiere Pro, Final Cut Pro X.
Join The Creator Weekly


Unlimited Royalty-Free Music & SFX
ARTLIST Get 2 FREE extra months


