Multicam Recording and Editing in DaVinci Resolve for Online Coachings
If you really want to stand out as a professional, it doesn't matter whether you are a content creator or an online coach. A step up like this will change everything. Setting up a camera to record yourself and do screen recording with a software for the best quality. You can now edit this yourself or with an editor (please share it with your editor). By doing this, you will stand out from 80% of the other people. Here's how I create these videos and edit the multicam recordings in Davinci Resolve in this blog post or video. It can be quite complex, but this is one of the fastest methods. Additionally, I offer editing services for content like this or short form content for social media. Please do not hesitate to contact me.

1. How to record a coaching session as multicam?
I am using a software called Detail.co which I have been using since the start of 2022. Since then, it’s a daily software I use for my 101 coaching sessions, filming YouTube videos and screen recording or creating easy social media content by using my phone or camera and recording all to my Mac in just seconds. I also have a separated video on my YouTube channel about this. Click here
Detail App -> https://detail.co/affiliates/maik-kleinert
Setting up the camera using CAM-LINK to connect the camera to the mac and then also record the screen while you not have to press record to the camera.
2. Setting up Detail for Multicam Recording
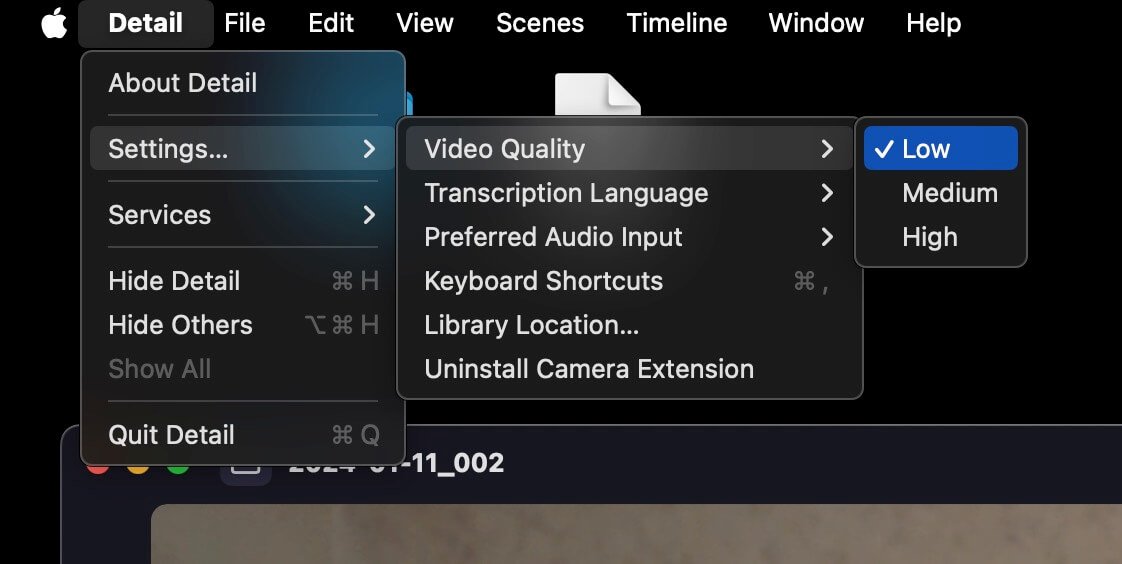
Go into the Menu at Detail then Settings and Video Quality to set it up on LOW.
Video quality: (Bitrate)
Low 10 megabit (25 GB for 1-2 hours)
Medium 20 megabit (50 GB for 1-2 hours)
High 35 (150 GB for 1-2 hours)
After recording, I want to export the .XML to import it to the editing software Davinci Resolve.
Go to File -> Export Timeline -> Export Source video as XML. Done
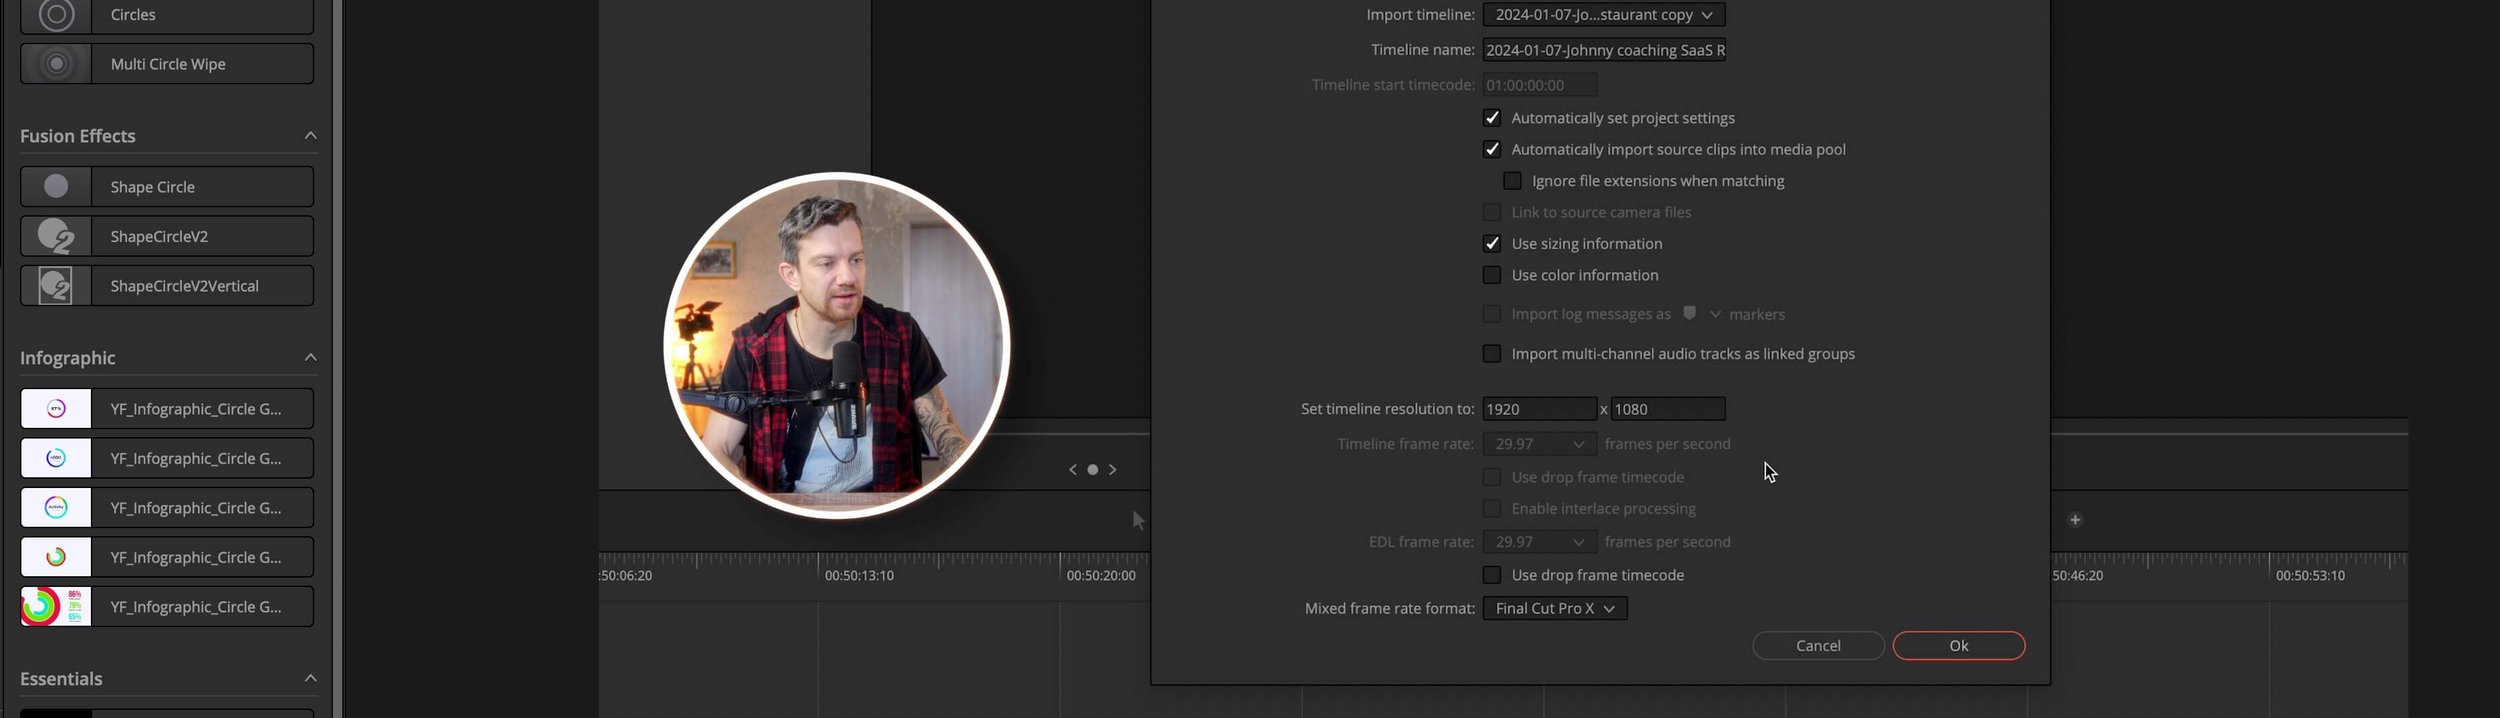
3. Importing XML into DaVinci Resolve
Open DaVinci Resolve and create a new project then right click and go to timeline -> import as XML then you choose the location where the XML is located.
You'll see now 2 video and 2 audio files, plus a multicam project where the footage is stored and synchronized, and one xml file, which is the timeline.
4. Setting up Davinci Resolve for Multicam editing
To see the multicam window, adjust the screen to see it by clicking first in the right top corner, then choosing at the first window left the little icon in the left bottom corner from source to the multicam.
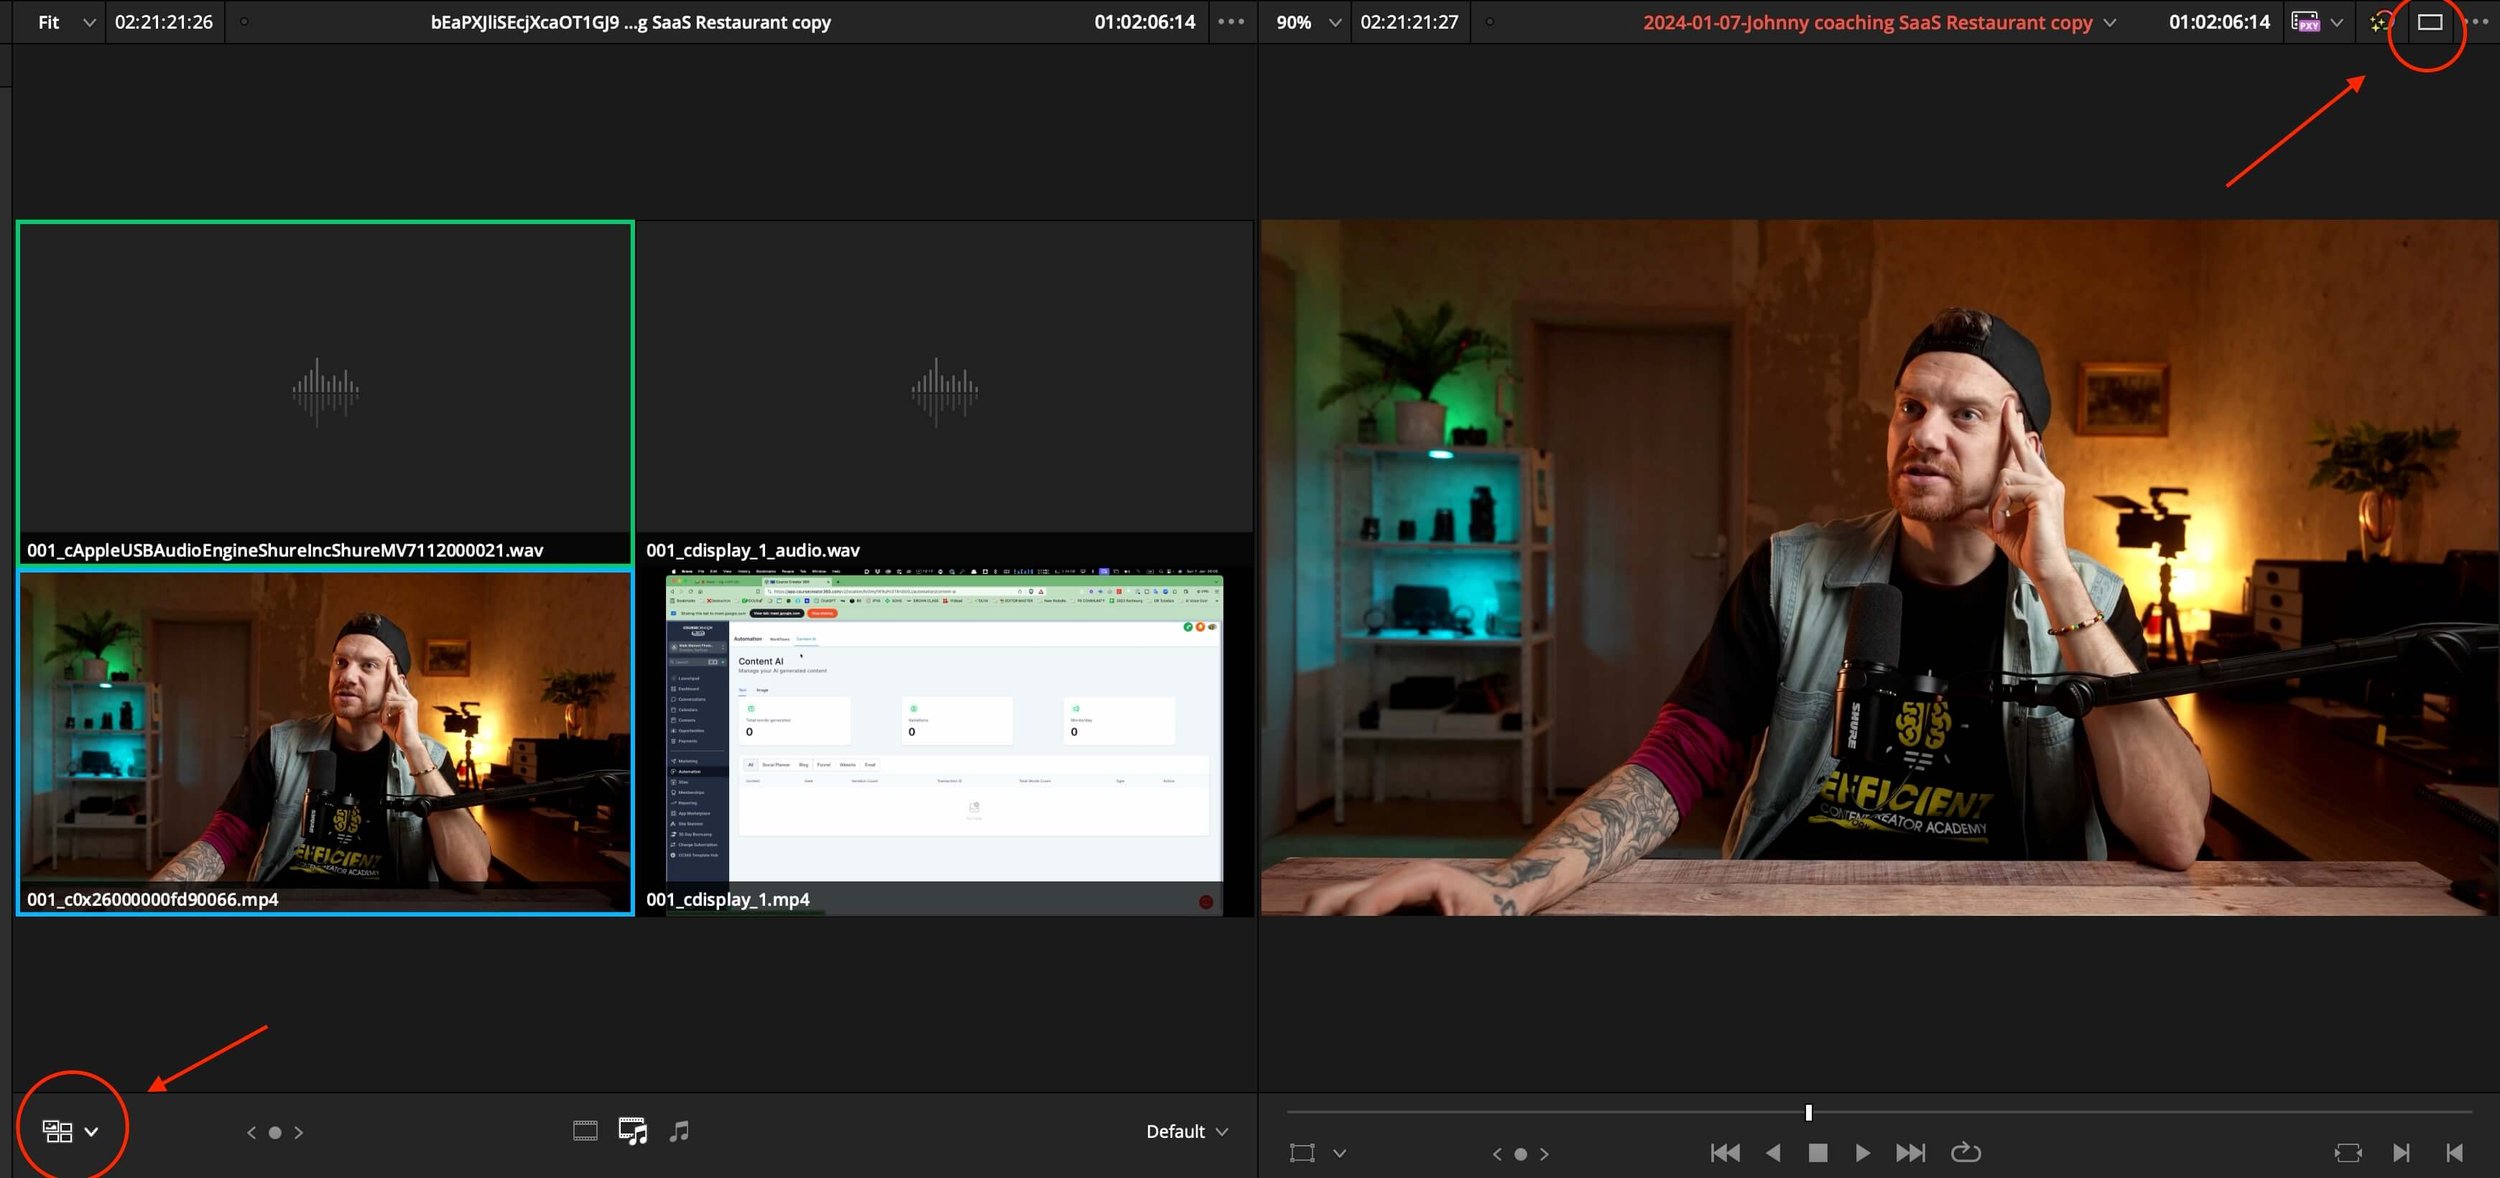
You can start editing the multicam video cutting from one camera angle to the other by choosing and clicking on the video 1 (camera) or video 2 (screen recording).
Pro Tip: The secret to 3x faster reading and learning is by reading & listening at the same time.
I use daily Speechify to read and listing to books, websites, emails or make a photo of a letter and let it read out loud to my. Life hack, so I want to introduce it to you as well. Save $60 by using my link for Speechify. https://geni.us/Speechify_VoiceReader
5. Using the Circle Mask Plugin by MrAlexTech
You want to even go further and want your video in a circle as you explain the screen?
Let me Introduce you to the amazing plugin from MrAlexTech the Circle Mask plugin for Davinci Resolve which is free.
Shot out to him for this amazing work @MrAlexTech Circle Mask plugin ►► https://ko-fi.com/s/f432b79e65
In my YouTube video, I show you how you set everything up and how you made it as easy as possible. So check it out 😉
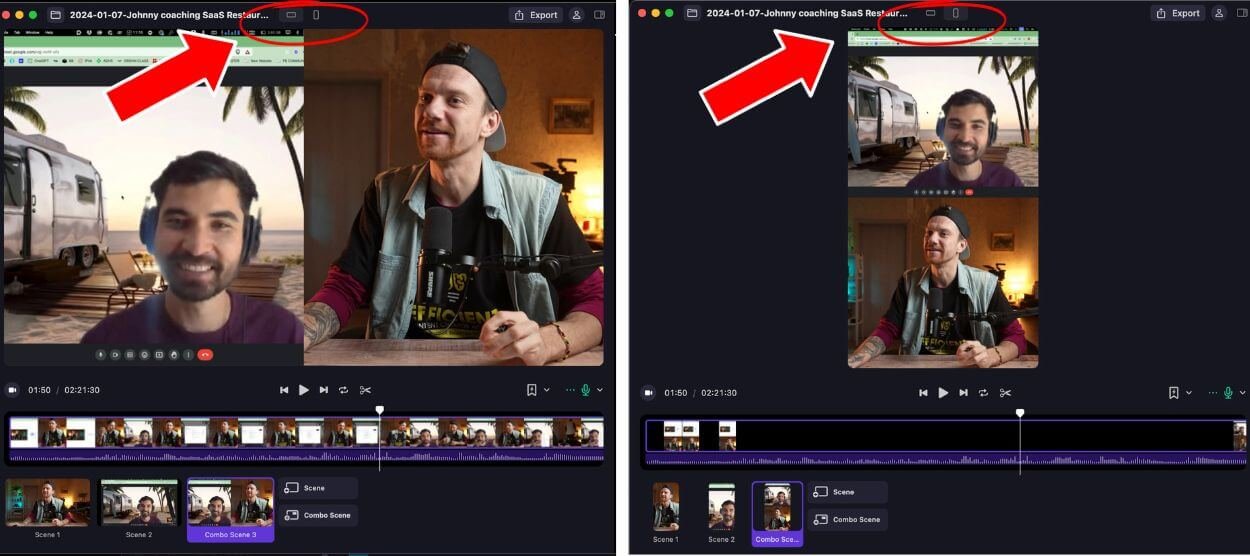
6. Creating Split-Screen
You can also create a simple split screen side by side in Davinci Resolve by using the crop function. Another fast option is by using Detail to create a side by side or vertical top and bottom view for social media.
Detail App -> https://detail.co/affiliates/maik-kleinert
Final Thoughts
That's it. You can remove any mistakes or breaks, then export and share the final video on social media. My conversion rate for getting clients has tripled since I always have my camera and nice studio set up. I also provide 101 coaching sessions on how to set everything up in order to bring success to you as well.
The first sentence they say is WOW, your set up looks impressive. They know, they're speaking to an expert. The first impression is always important. It's like an Uber ride where you step in the car and it has a nice lemon smell. 😀
It would mean a lot if you share my blog post on your social media or with friends, so I can help more people. If you got some value, feel free to send me a donation, this will support the work I do.
Check out my Video on Youtube
👍🏻Like, Share and Subscribe 🙏❤️😀
TOOL LIST FOR CREATORS:
🎞️ 🎶 | All My Music, SFX & Stock Footage comes from ►► https://geni.us/ARTLIST-ARTGRID-MK
🤖 | All My Title Animation and Motion Designs comes from ►► https://geni.us/MotionVFX_Davinci
🔴 | (TubeBuddy) YouTube Title & Keyword tool I use: ►► https://geni.us/TubeBuddy-MK
Color Grading Tools:
🎨 | DeHancer - 10% OFF code "MAIK" ► https://geni.us/DeHancer
BEST Film emulation, Filmlook, Film Grain, Halation, Bloom
1. Click the Link ► https://geni.us/DeHancer
2. Click on BUY, then enter the Promo Code "MAIK"
You get then 10% DISCOUNT on Dehancer software
🎨 | Cinema Grade “MAIK“ *GET 20% DISCOUNT* ► https://geni.us/FREE-PDF-CinemaGrade
Simple color grading tool with slider for Davinci Resolve, Premiere Pro, and Final Cut.
My Equipment & Education List:
🎬 | MY GEAR LIST ► https://kit.co/MaikKleinert
💻 | FREE DIGITAL PRODUCTS: Discounts, LR Presets, LUT’s ► https://www.maikkleinert.com/shop
⏰ | LRTimelapse Software- Timelapse & Hyperlapse ► https://geni.us/LRTimelapse
💰 | WIRESTOCK Selling Stockfootage ► https://geni.us/Wirestock
📚 ONLINE COURSES I joined 🎬
📹 | KOLDER CREATIVE - Sam Kolder advanced editing ► https://geni.us/KolderCreative
⏰ | Timelapse & Hyperlapse - Matjoez ► https://geni.us/TimelapseCourse
🎥 | FULLTIME FILMMAKER ► https://geni.us/FullTimeFilmaker-MK
Get your FREE Lightroom Preset Pack
FREE DOWNLOAD and ready to use for Desktop and Mobile
Beautiful orange and teal tones
Amazing Urban Street look
Complex color grades in just ONE CLICK
Faster and more efficient workflow
For Desktop & Mobile
Click Here to Download

Get your 20% discount for Cinema Grade the time-saving color grading tool.

Join The Creator Weekly

Get 10% OFF MotionVFX with the CODE: “MAIK”
”BEST DaVinci Resolve plugins to take your editing and visual effects to another level. Speed up your work with easy-to-use presets and boost your videos!”

All my Music, SFX & Stock Footage comes from
Unlimited & Royalty-Free
More Blog Posts:


Blinkist listing to books! Listen zu a book summary in under 15 minutes. Try it out!